In this tutorial, we will show you how to build a low cost thermometer, using Arduino & DS18B20 waterproof version (Digital Temperature Sensor)
Step 1: Items you need to have
- Arduino UNO (or other Arduino Models)
- DS18B20 Waterproof
- Resistor 4.7KOhm (Preferably 1/2Watt). You can check the Watt availability for 4.7KOhm
- Breadboard (Any time type you want, check them here)
- Jumper Wires Male to Male
This tutorial will let you measure the temperature of the air, liquids (Like Water) and the temperature of the ground. Basically you can measure the temperatures of any thing in the range of DS18B20.
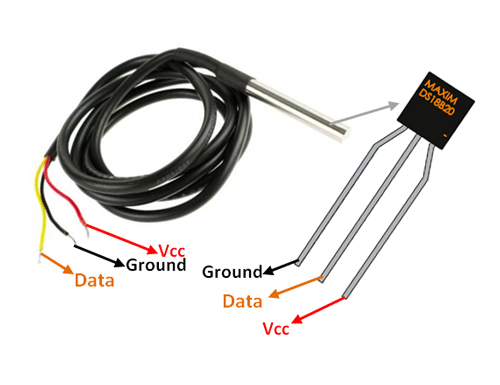
DS18B20 is 1-Wire digital temperature sensor from Maxim IC. It reports degrees in Celsius with 9 to 12 bit precision, from -55 to 125 (+/- 0.5). Each sensor has a unique 64 Bit Serial number etched into it: this allows the use of huge number of sensors on one data bus.
You can always check all the details about this item on our website.
Step 2: Insure you have the below Libraries
Before you start the wiring part, make sure you’ve downloaded the appropriate libraries. Download and unzip the following libraries:
- at /Program Files(x86)/Arduino/Libraries (If you’re using Windows as OS)
- at the Libraries Folder in the Arduino Folder (If you’re using Mac)
1-Wire bus
Dallas Temperature
1-Wire bus is used to be able to receive the info from the “Data pin”
Dallas Temperature, it does all the calculations and other stuff
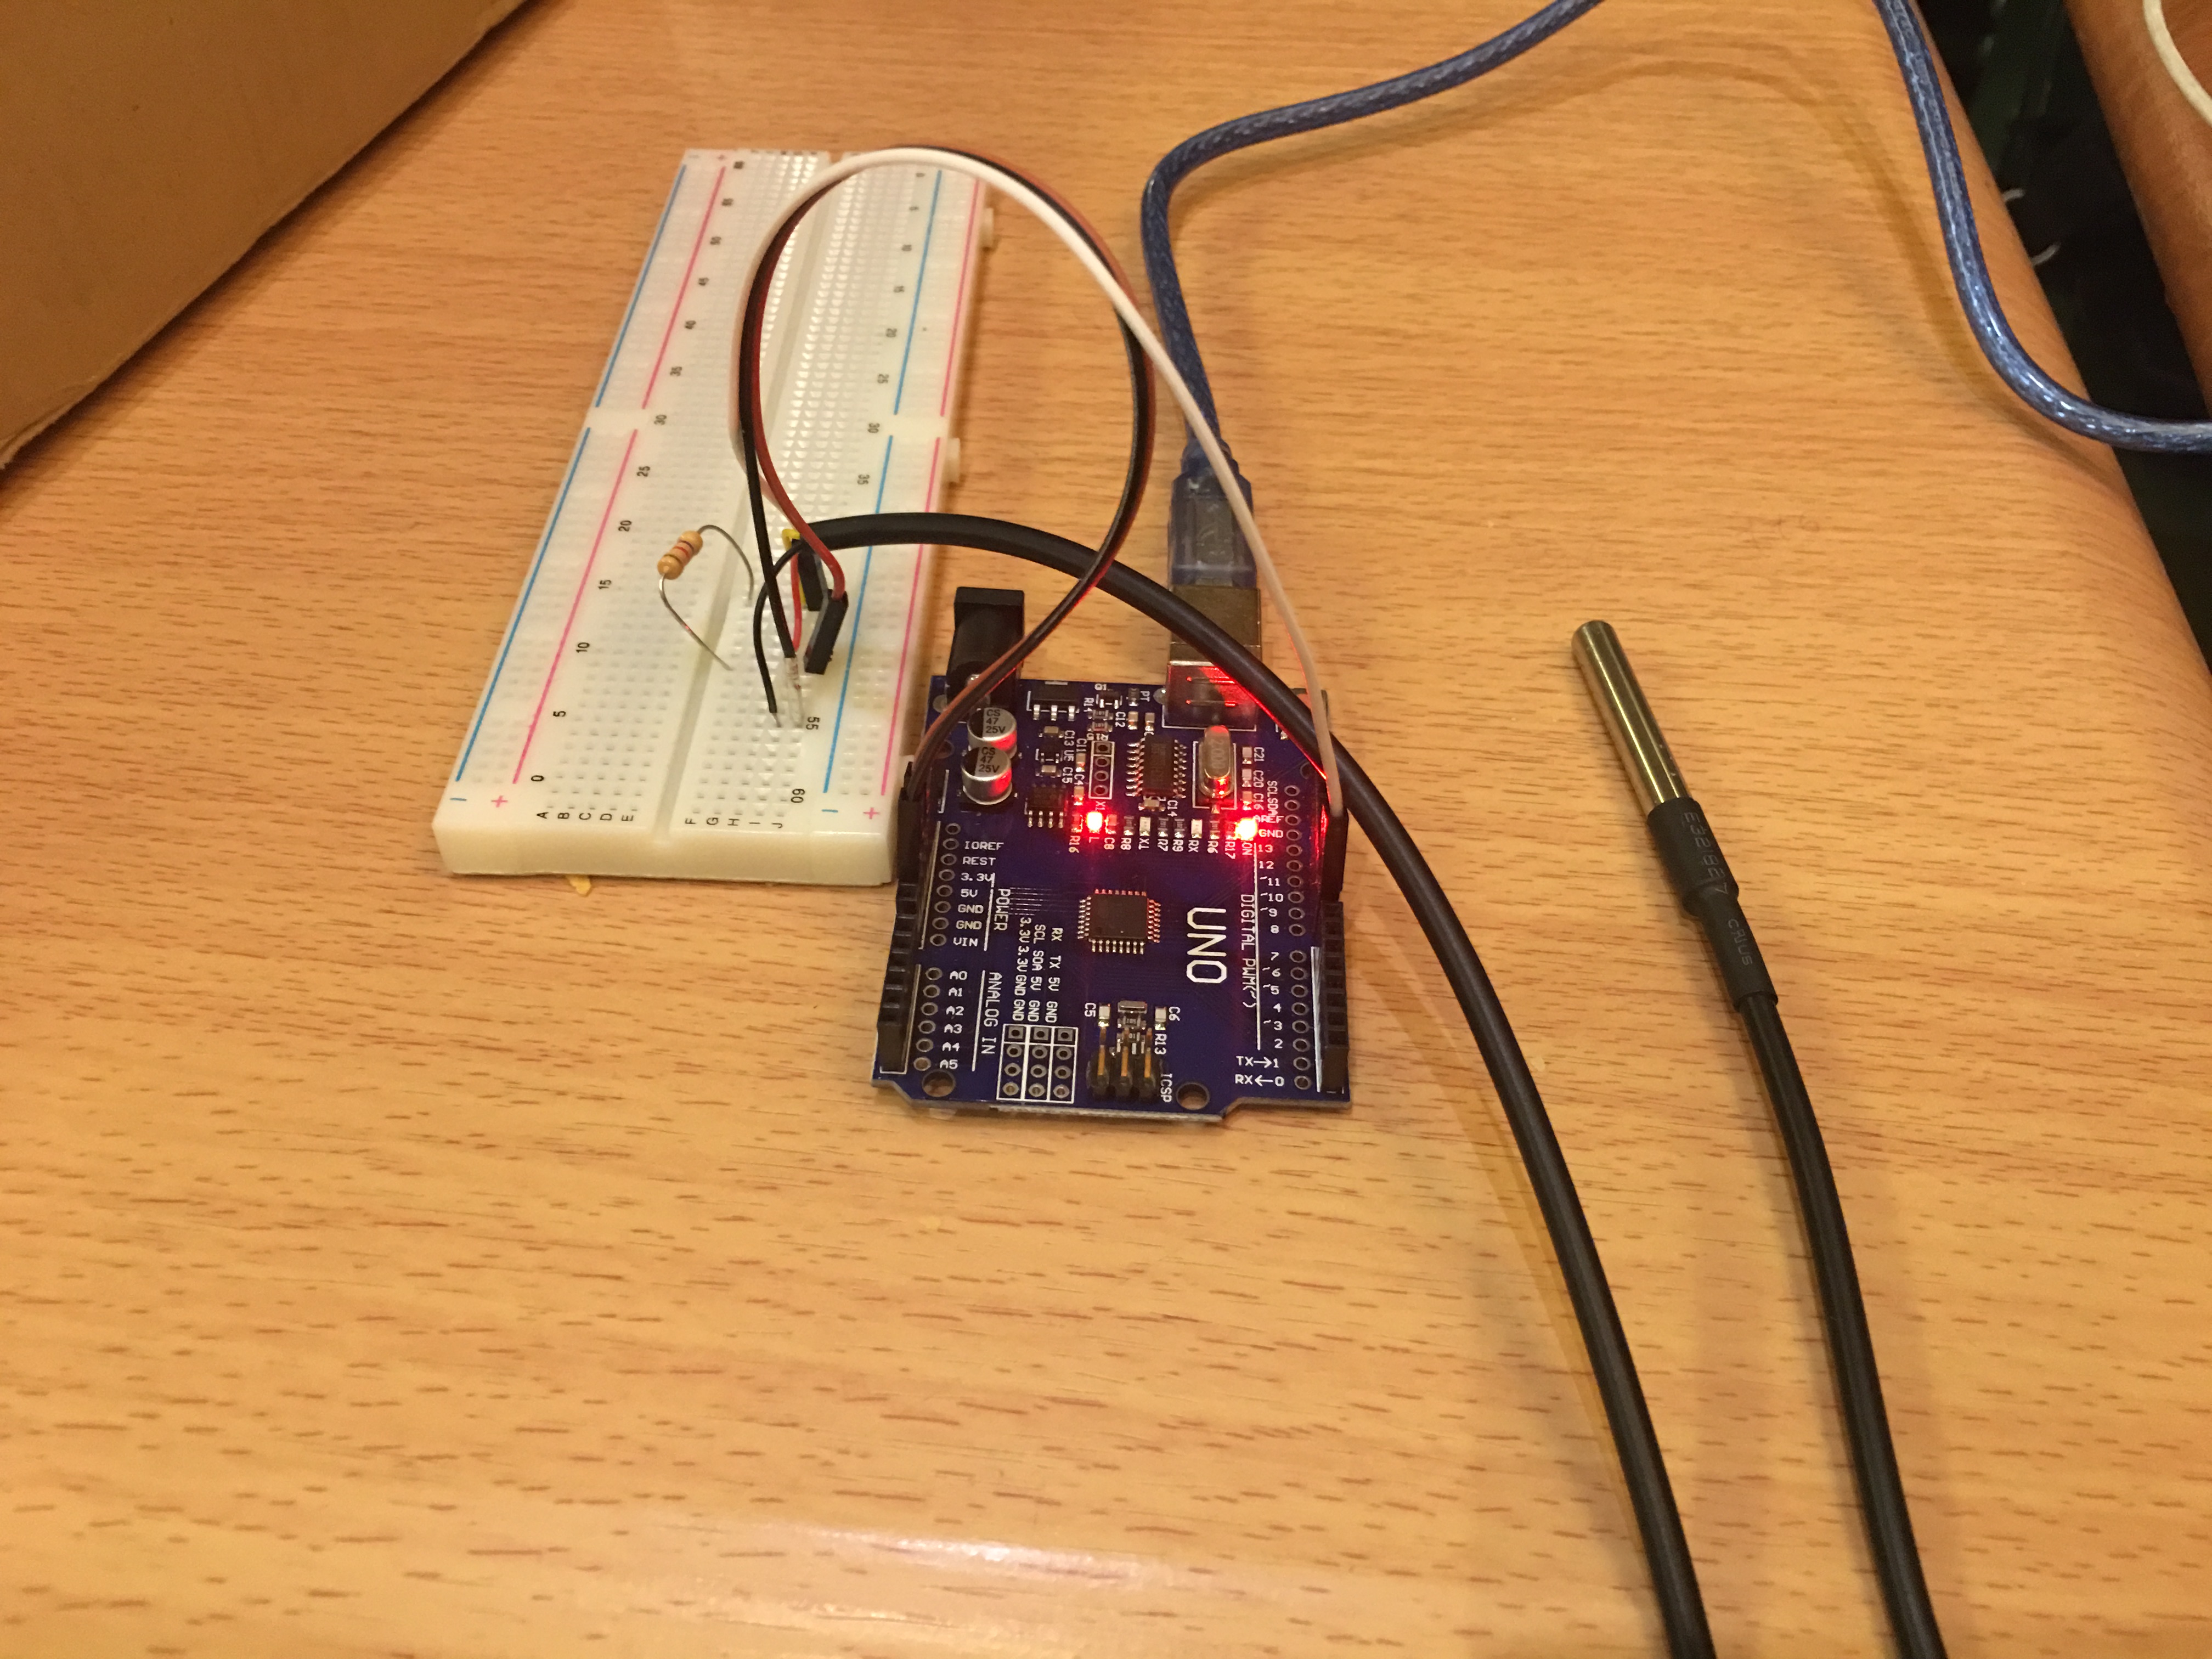
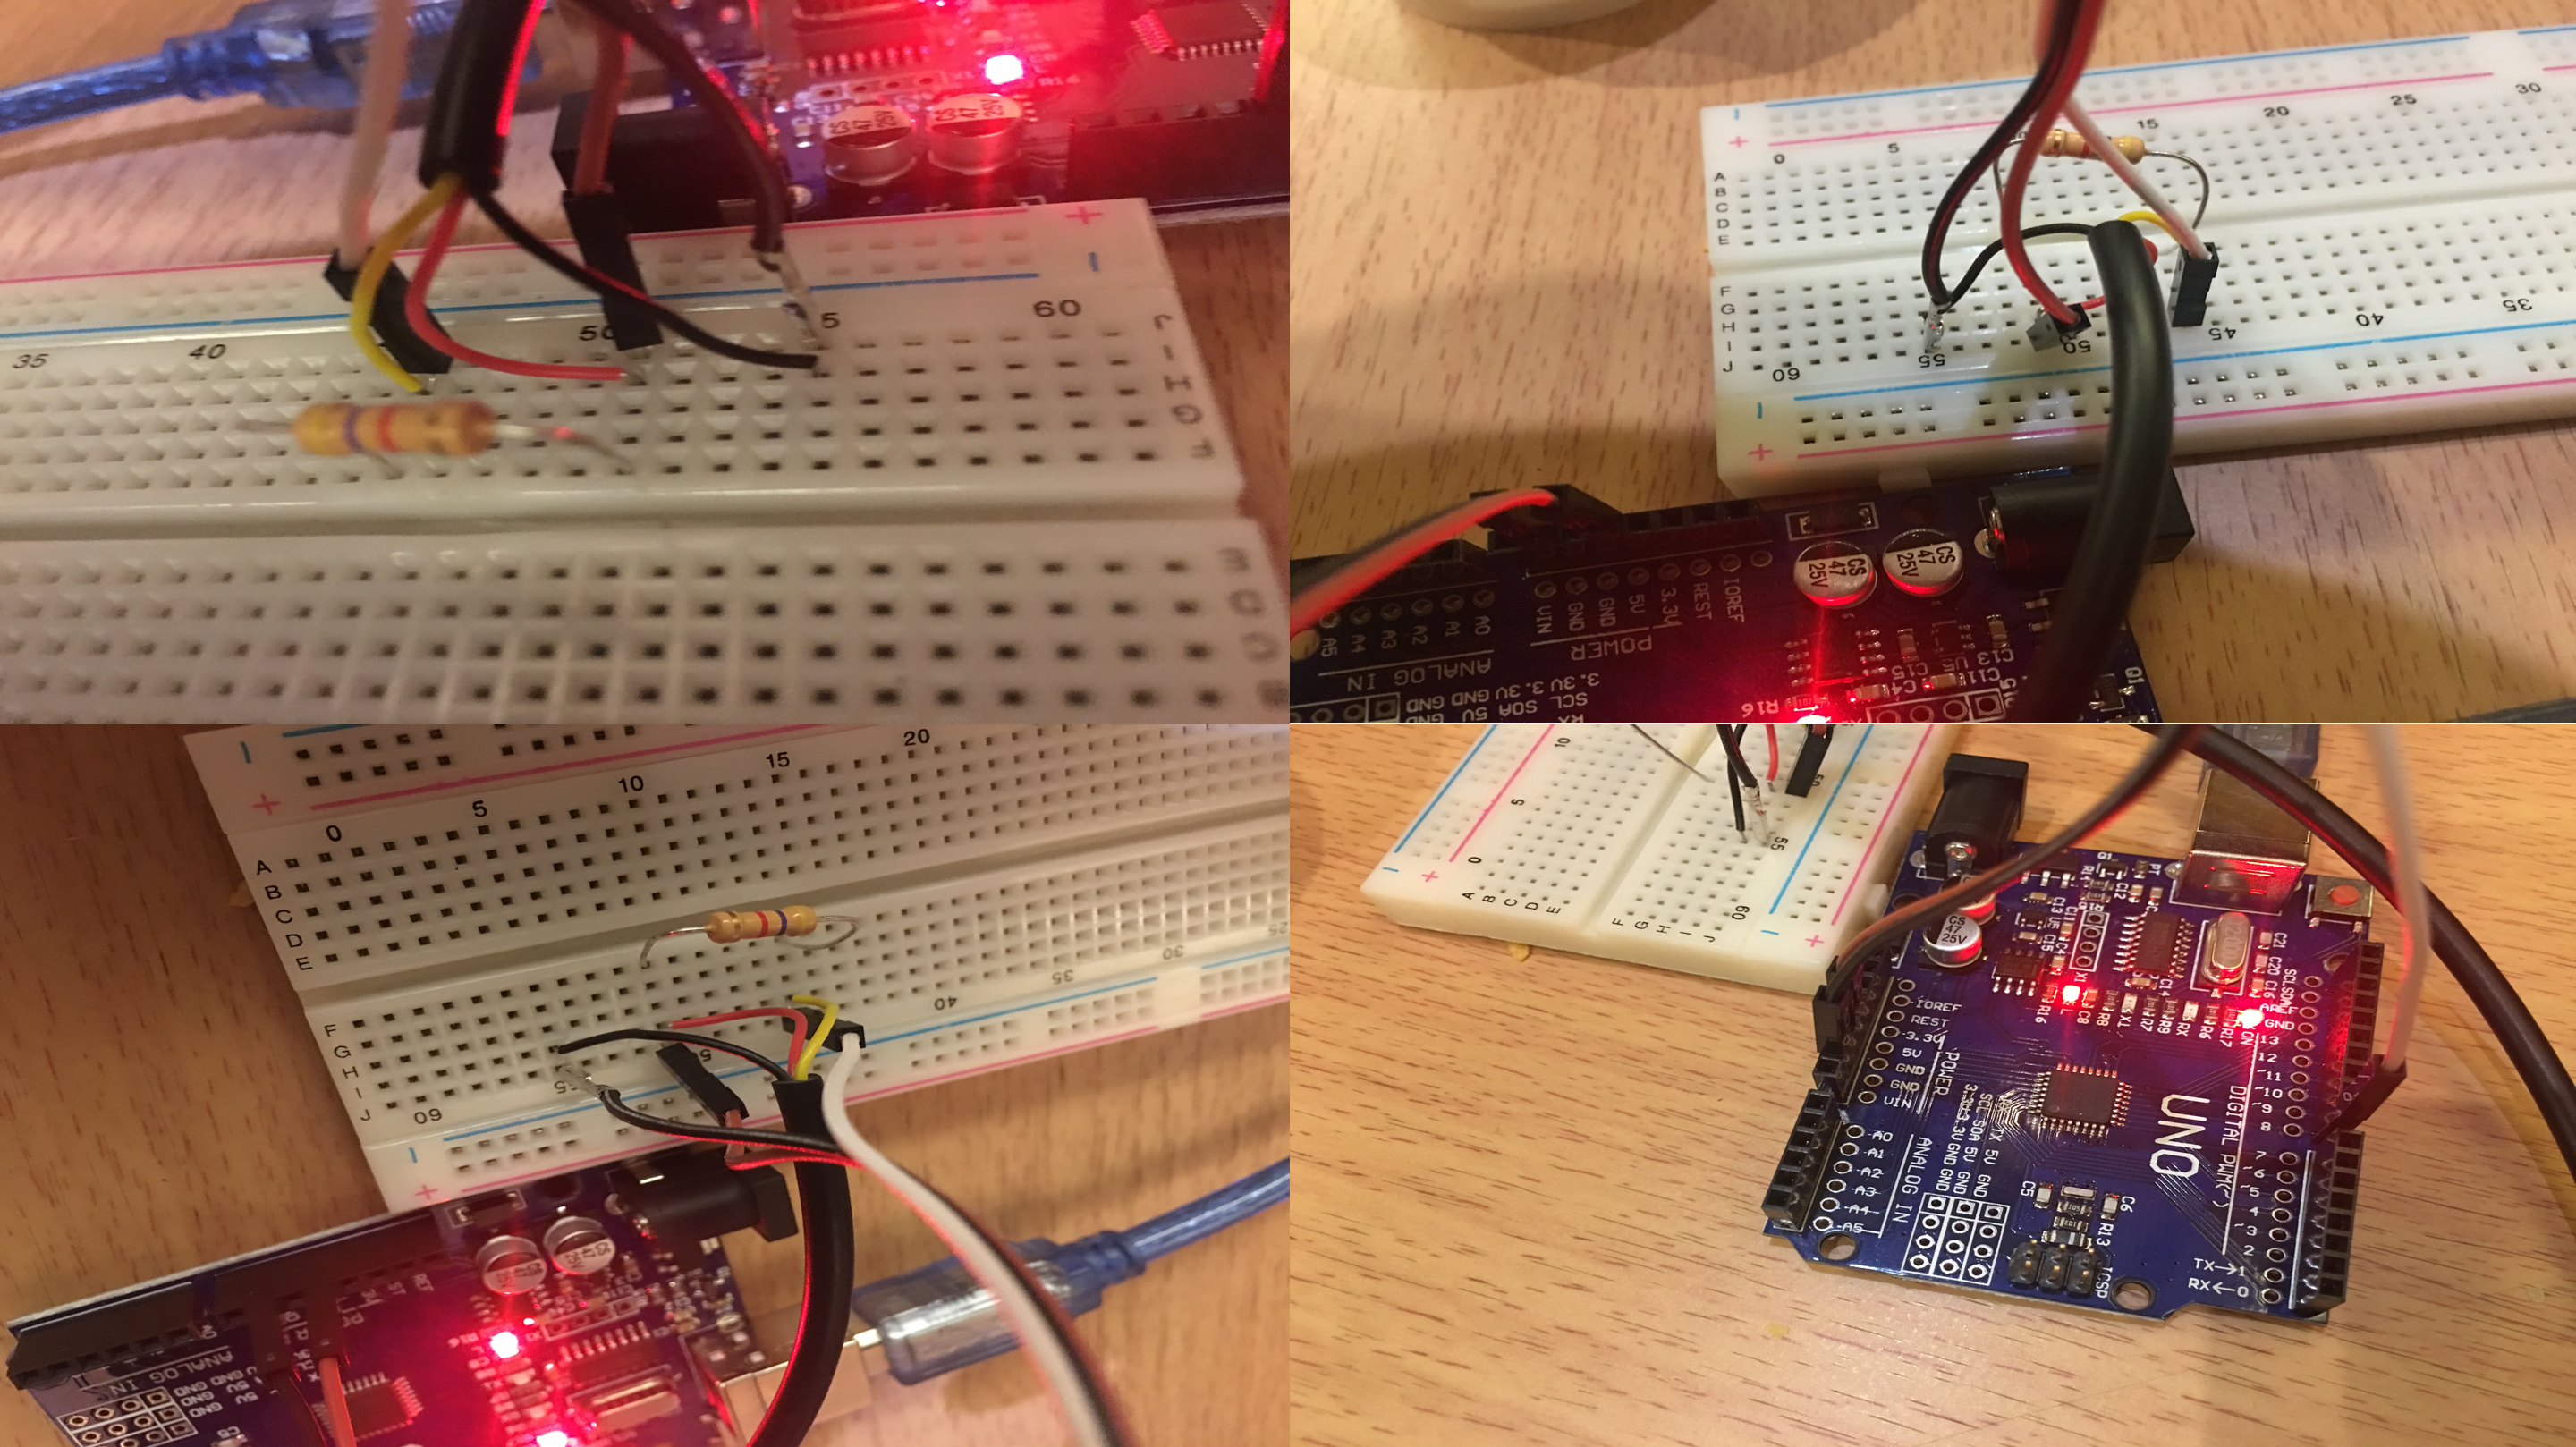
Step 3: Wiring
This step is so simple, it is divided into 2 simple parts:
Part 1: connect the resistor 4.7KOhm to Vcc and Data pins
Part 2:
|
DS18B20 Pins |
Arduino Pins |
|
Vcc (Red wire) |
Vcc (3.3V or 5V) |
|
GND (Black Wire) |
GND |
|
Data (Yellow Wire) |
Pin 8 (In this example) |
Step 4: Code
/********************************************************************/

// First we include the libraries

#include <OneWire.h>

#include <DallasTemperature.h>

/********************************************************************/

// Data wire is plugged into pin 2 on the Arduino

#define ONE_WIRE_BUS 8

/********************************************************************/

// Setup a oneWire instance to communicate with any OneWire devices

// (not just Maxim/Dallas temperature ICs)

OneWire oneWire(ONE_WIRE_BUS);

/********************************************************************/

// Pass our oneWire reference to Dallas Temperature.

DallasTemperature sensors(&oneWire);

/********************************************************************/

void setup(void)

{

 // start serial port

 Serial.begin(9600);

 Serial.println("Dallas Temperature IC Control Library Demo");

 // Start up the library

 sensors.begin();

}

void loop(void)

{


 // call sensors.requestTemperatures() to issue a global temperature

 // request to all devices on the bus

/********************************************************************/

//// Serial.print(" Requesting temperatures...");

 sensors.requestTemperatures(); // Send the command to get temperature readings

//// Serial.println("DONE");

/********************************************************************/

 Serial.print("Temperature is: ");

 Serial.println(sensors.getTempCByIndex(0)); // Why "byIndex"?

   // You can have more than one DS18B20 on the same bus.

   // 0 refers to the first IC on the wire

   delay(1000);

}

Upload the code above to your Arduino (Don’t forget to choose the correct Arduino Model and Correct Port Number), open the Serial Monitor (Make sure you choose the baud rate 9600) and enjoy your thermometer!
Please contact us if you face any problems during this tutorial…

